
Please wait, I'm coming over...


Last Changed 7/22/2007 |
||
|
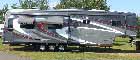
Most Volvo owners have mounted their electrical components in the
baggage compartment. We put the trailing wiring converter and the
inverter/charger in a box under the refrigerator located in the
cabinet behind the driver. We had the spare space because of the
refrigerator size and this leaves the baggage compartment space
available. The box gave me a lot of space to do the
trailer and
headache rack cabinet wiring. |
||
 |
The physical layout of the Electrical Compartment under the refrigerator. | |
 |
This is the initial wiring in the Electrical Compartment. The Inverter/Charger
is on the left. For more on the AC Wiring. |
|
click on images to enlarge |
||
 |
The schematic of the terminal strips in the Electrical Compartment. | |
click on images to enlarge |
||
 |
To help seal the entry of cabling through the cab floor into the Electrical Compartment, We used these electrical conduit junction
boxes. The extended collar had a short piece of conduit added and inserted into a hole cut in the floor. When the wiring is finished,
the lower end opening will be sealed with silicon caulk. More on DC Wiring. |
|
 |
||
click on images to enlarge |
||
 |
This is the face of the Electrical Compartment. Through the vent area on the left you can see the Inverter/Charger. On the right you can see the Distribution Panel described in AC Wiring. | |
 |
Here you can see how the Electrical Compartment sits under the refrigerator under the Sink Drawer. This is the compartment just behind the driver. | |
click on images to enlarge |
||
Disclaimer: The information in this site is a collection of data we derived from the vendors and from our personal experiences. This information is meant as a learning guide for you to make your own decisions Best practices and code should always be followed. The recommendations we make are from our personal experiences and we do not receive any compensation for those recommendations. |