
Please wait, I'm coming over...

Last Changed 4/9/2016 |
||
|
We use the Winegard Sensar (batwing) antenna as a mount for our
4G antenna on Tige.
The Bounder we bought comes with a fixed over-the-air (OTA)
antenna and was not suitable for mounting a 4G antenna. |
||
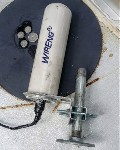 |
We got the idea from Jack Mayer who has a great
website for communication
information. Jack used a pipe and a pipe flange to attach the antenna. The pipe flange was attached to a sheet of steel with magnets. The idea is that if the antenna is struck, it can tip over. |
|
 |
We use a plastic marine antenna base and a piece of an old
fiberglass marine
antenna extension mast that screws on the base. We got the 45 lb. pull magnets from Amazon. They have #10 holes. |
|
click on images to enlarge |
||
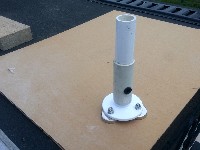 |
We used stainless 10-24 flathead screws, washers and nuts to mount
the magnets in the marine antenna base mounting holes. We used marine antenna components because the plastic and fiberglass should not have an effect on the antenna like the steel pipe that Jack used might. |
|
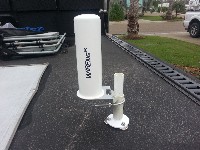 |
This is how we originally planned to mount the
WirEng BoatAnt on our
mount. We choose the BoatAnt because of its small form factor with a high level of signal reception. |
|
click on images to enlarge |
||
 |
We modified the fiberglass extension stub by shortening it and
notching to fit the bottom of the WirEng BoatAnt. We can now mount the BoatAnt across the antenna mount. |
|
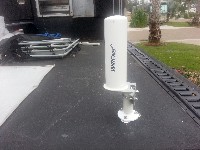 |
This is our BoatAnt ready to put on the steel sheet on the
top of the Bounder. The mount with the antenna outside of the mount was pretty stable. Now with the antenna across the mount, it is very stable. The U-Bolts we receive with the BoatAnt were plain steel. We happed to have stainless U-bolts and used them instead. |
|
click on images to enlarge |
||
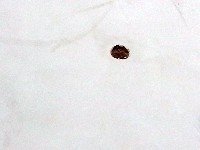 |
We drilled from inside with a long 1/4" drill bit so we
knew where the
entry point would be. We then used a 3/4" hole say to cut through the roof. We had to also cut from the inside to complete the hole. |
|
 |
We are running a piece of 1/2"electrical PVC conduit. We use a 3/4"-to-1/2" reducer to add to the surface area for gluing the conduit and reducer to the electrical box. |
|
click on images to enlarge |
||
 |
We drilled through the bottom of the PVC electrical box for the 1/2"
conduit gluing the conduit and the reducer. 3M 5200 adhesive caulk was spread under the bottom surface of the electrical box. We use masking tape to make for cleaner caulk lines. After the caulk is smoothed, the masking tape is removed. |
|
 |
The hole from the inside. We had trial fitted the conduit to know what its length should be. | |
click on images to enlarge |
||
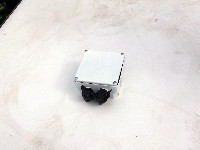 |
The roof access will be used with the 4G Antenna and the Bullet mount. | |
 |
We use wire ties (left) to gold cable on the roof. The
adhesive back of the wire tires (left center) is not good for
exterior use, We remove the regular adhesive (right center)
using lacquer thinner. Then we apply 3M Red Label super tape. |
|
click on images to enlarge |
||
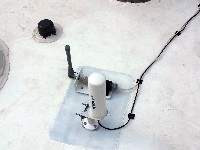 |
Here are the 4G Antenna and the
Bullet radio magnetically attached to a
steel plate caulked to the roof. The steel plate is painted to resist rust.. |
|
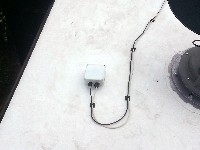 |
We used the prepped wire ties to route the 4G Antenna cable and the Cat-5 cable from the Bullet radio to the roof entrance.. | |
click on images to enlarge |
||
The ever more clear hindsight said we should have used 3/4" conduit instead of 1/2" With the 1/2" conduit, we had to feed the RJ45/CAT-5 cable from the Bullet first followed by the SMA cable from the 4-G Antenna. With a 3/4" conduit we could feed either cable first. |
||
Disclaimer: The information in this site is a collection of data we derived from the vendors and from our personal experiences. This information is meant as a learning guide for you to make your own decisions Best practices and code should always be followed. The recommendations we make are from our personal experiences and we do not receive any compensation for those recommendations. |