
Please wait, I'm coming over...


Last Changed 3/5/2017 |
||
| We have had times when we could not get a shot at the satellite with our dish because of trees. One of our laptops has built-in Wi-Fi. The other laptop has a Wi-Fi PCMCIA card. We also have a USB Wi-Fi adapter that we use with the desktop PC and the navigation computer in Red Rover. We used these Wi-Fi connections but we encountered two problems doing this. | ||
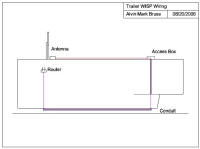
Our local LAN |
||
 |
With the three PCs, we also have a LAN printer. When we are on the
satellite, we use wired and wireless connections to our wireless
router attached to the HughesNet HN7000S modem. The local LAN allows
us to share files and the printer. When we are on wireless connections to the park Wi-Fi, we lost connection to our printer and shared file store, an inconvenience. |
|
click on image to enlarge |
||
Signal StrengthThe other problem we ran into often was poor signal strength. By nature, RV parks cover a large area of real estate and quite often have trees that cause interference with Wi-Fi signals. Also, using the Wi-Fi adapters in our laptops, we were subject to the interference of any other RV between the park antenna and us. This gave us dropped connects while we were receiving email or web browsing. |
||
CPE/WISP SolutionThe solution we installed for those times when we cannot use our satellite Internet is a WISP (Wireless Internet Service Provider) radio on the top of our trailer with a high gain (15 db.) omni-directional (omni) antenna. This radio connects to the park Wi-Fi. The enhanced strength of the antenna and it's location on the roof allows connection even in weak strength areas of the campground. The WISP radio connects to our router just like the HN7000S modem used in the satellite Internet connection. With this setup, when we are on Wi-Fi, we have a better chance to make connection to the park Wi-Fi and when we do, we still have our local LAN with file and printer sharing. The new name for WISP equipment is now Customer Premises Equipment (CPE).We had assistance from Jack Mayer on the selection of the WISP radio, a Deliberant DLB 2310, and an omni antenna. Jack had good experience with Deliberant products and they offered the WISP mode. We choose an omni antenna so that we did not have to aim the antenna as we would have had to do with a directional antenna. Since we have the CPE/WISP setup, we prefer to use park Wi-Fi when we can. If park Wi-Fi is available, we can use it. Not that park Wi-Fi is always that good. We have even managed to use a free Wi-Fi source that outside the park we were in when the park Wi-Fi failed. Interested in doing this?If click on the LINK you will download a 29MB Zip file with documents on how to setup and operate a Deliberant CPE-2 with screenshots of each step.The is a new alternative to the Deliberant radio,. the Ubiquiti Bullet 2HP radio. A description of an installation of a Bullet is found at Bullet Install, |
||
To accompany the Bullet installation, there are also these documents: And to assist the setup: And finally, to configure the CradlePoint MBR1000 wireless router (Note - the MBR900 and MBR1200 are very similar): |
||
The CPE Installation |
||
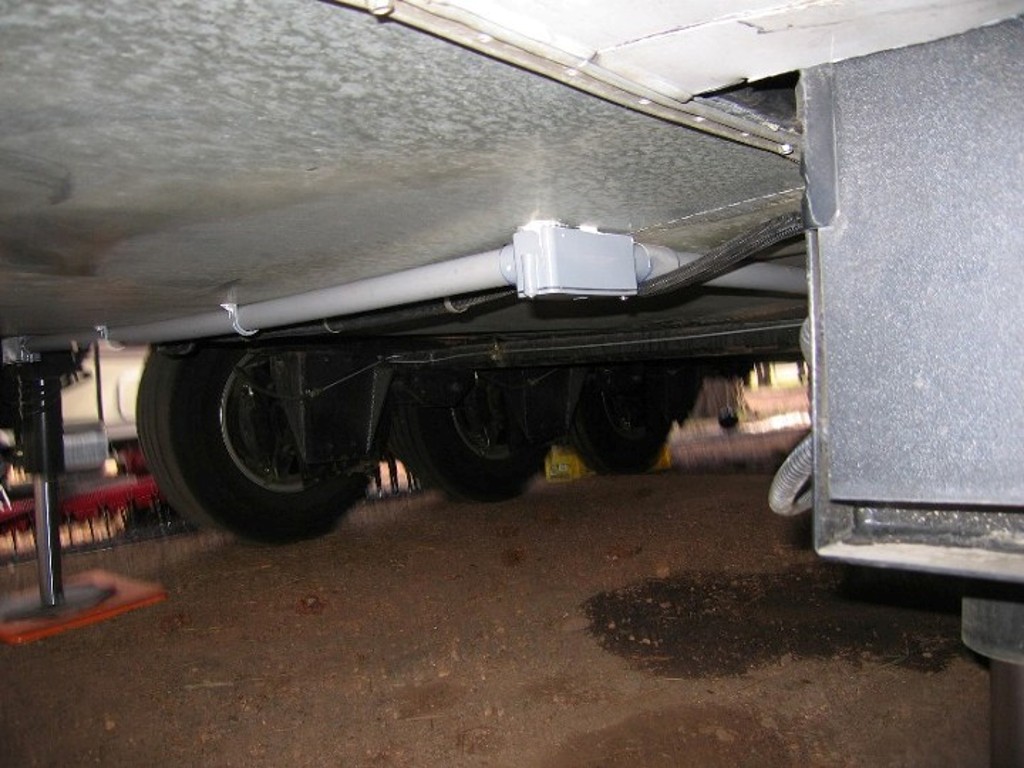
 |
The Deliberant DLB 2310 was mounted on the fiberglass roof of our
trailer. We used 3M 5200 Adhesive Caulk to attached the radio. The
radio receives it power through the Category 5 (Cat-5) wire that is
also carrying the logic signals to the router. The antenna connects to the DLB2310 with a type N cable. |
|
 |
We had top replace the DLB2310 with a Deliberant CPE-2 which is like the DLB2310
with the addition of a built-in flat panel antenna. We still used the 15db
omni-directional antenna. Since we glued the DLB2310 to the roof, we mounted a bracket to the DLB2310 case and used it to mount the CPE-2. |
|
 |
We mounted the omni-directional antenna onto a 4’ mast extension, normally used with a boat VHF antenna. | |
click on images to enlarge |
||
 |
We also used a fold-down boat antenna mount. This gave us an easy
way to erect and collapse the antenna. Our boating experience gave
us more options to do this installation. In addition to screwing the mount to the roof, we glued the radio and the antenna base to our fiberglass roof. We used 3M 5200 adhesive caulk that is another product we knew about due to our boating history. |
|
 |
We ran a outdoor grade Cat-5 cable from the DLB2310 across the roof using regular RV roof caulk by making puddles along the Cat-5 cable to hold it in place. | |
click on images to enlarge |
||
Cat-5 CablingWe routed the Cat-5 cable from the roof to the belly by following the same path we created for the solar wiring. |
||
 |
Then we routed the Cat-5 cable from the front right electric compartment to the left rear slide into the entertainment compartment where the wireless router is located. | |
 |
We ran the Cat-5 cable, along with a coax cable, in a plastic conduit run attached to the belly of the trailer. | |
click on images to enlarge |
||
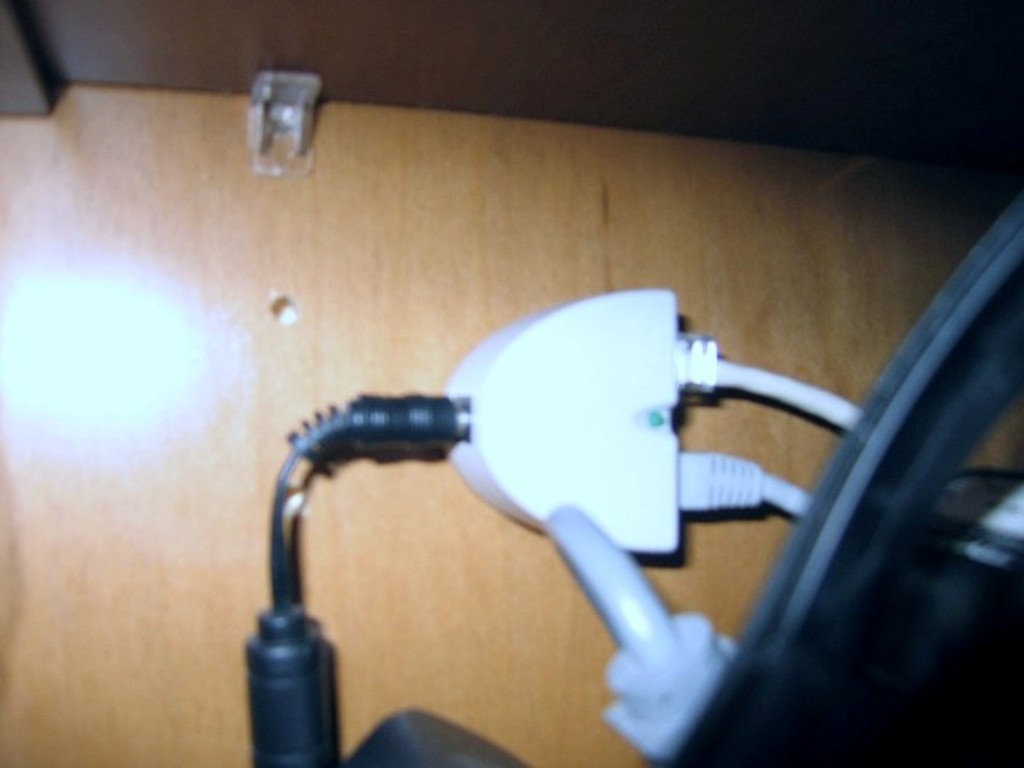 |
The Cat-5 cable from the Deliberant radio is connected to a power
injector in our electronics compartment in the living room. We
connect the power injector to our wireless router with a Cat-5 patch
cable. When we use the Deliberant 2310 as a WISP radio, the Cat-5 patch cable is plugged into the Internet port of the router. |
|
click on images to enlarge |
||
When we use the HN7000S satellite modem, the patch cable is plugged into one of the switch ports of the router and the Deliberant 2310 is setup to run as an Access Point (AP). We use the swap cable method rather than using a RJ45 switch. |
||
LAN ChangesWhen we added an air-card setup, we moved a lot of the LAN equipment around in the trailer and added a second C{E radio. The changes are covered in Air-Card Installation. |
||
A New RadioWhile our Deliberant radio was still functional, there has been a lot of technology changes since we first acquired the radio.We helped a friend install a Ubiquiti Bullet radio in 2011, Bullet Install. At the time, we preferred the User Interface (UI) of the Bullet and it faster changes. As we were redoing the wiring on the roof for the solar panels, we decided to change the wiring for the CPE radio. We also included another RG6 cable from the Winegard Trav'ler satellite dish to the bedroom in the same conduit. |
||
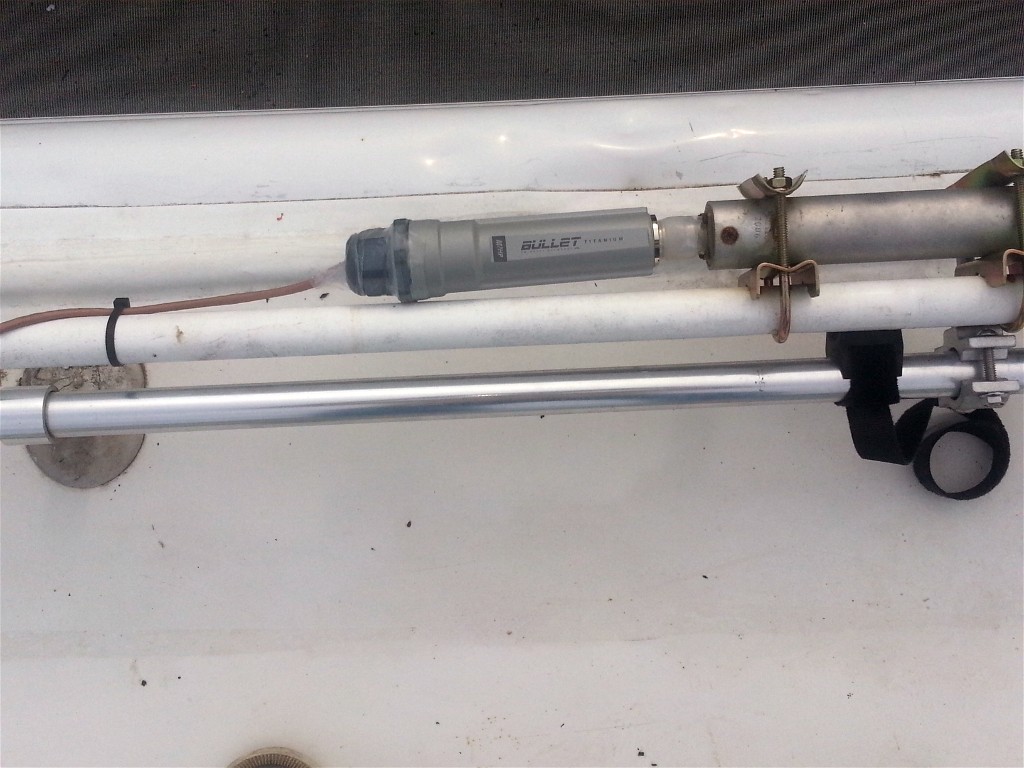 |
We choose a Bullet Titanium as it has a durable aluminum with a more
weatherproof cable connection. The Bullet attaches to the N-connector of the antenna. We coved the connector with Rescue Tape. |
|
 |
We used outdoor grade Cat-5 cable to make the interconnect cable
from the Bullet to the terminus end of the PVC conduit body. RJ45 plug are on each cable end and a connector combines them. |
|
click on images to enlarge |
||
 |
Previously, the antenna was Velcroed to the railing when retracted.
We were a little concerned about the antenna bouncing with the
Bullet attached. We found this railing fitting from a marine catalog to provide a bracket for the antenna when it is down for travel . |
|
click on images to enlarge |
||
On the BounderWe are using a Ubiquity Bullet radio on Joey, our Bounder motorhome but with a different mount and antenna.For details see Bullet Mount. |
||
Disclaimer: The information in this site is a collection of data we derived from the vendors and from our personal experiences. This information is meant as a learning guide for you to make your own decisions Best practices and code should always be followed. The recommendations we make are from our personal experiences and we do not receive any compensation for those recommendations. |