
Please wait, I'm coming over...


Last Changed 11/10/2011 |
||
|
We have been using water filters mounted inside a Rubberneck Tub
from shortly after we went on the rod. The system has work
well for us. A small negative to our water filter tub is the
weight since we used large capacity canister filters. While doing another project, we noticed an area in a compartment located behind the cargo compartment that might be large enough to hold the water filters if they were installed onboard. This is where the water pump and several of the drain pipes are located. |
||
 |
This was our water filter tub. It held the water filters, the water pressure regulator. We also carried two of our hoses in the tub. |
|
 |
This was the water filter assembly located inside the tub. The water enters through a pressure gauge so we know what level of pressure the park has. Then the water goes through a household sized pressure regulator and another gauge to check if the regulator is working Finally the water went through the silt and carbon filter and out a hose into the trailer city water inlet. |
|
click on pictures to enlarge |
||
 |
This is the area we found to install the water filters onboard. The steel frame is the inside steps from the kitchen to the bathroom/bedroom. |
|
 |
This is the pipe from the freshwater tank to the water pump. There is a diverter valve that when turned, allows the pump to suck antifreeze solution through the clear hose into the trailer water system. We thought it was be handy to have a diverter valve that would fill the freshwater tank from the city water supply. This would be where to put the valve. |
|
click on pictures to enlarged |
||
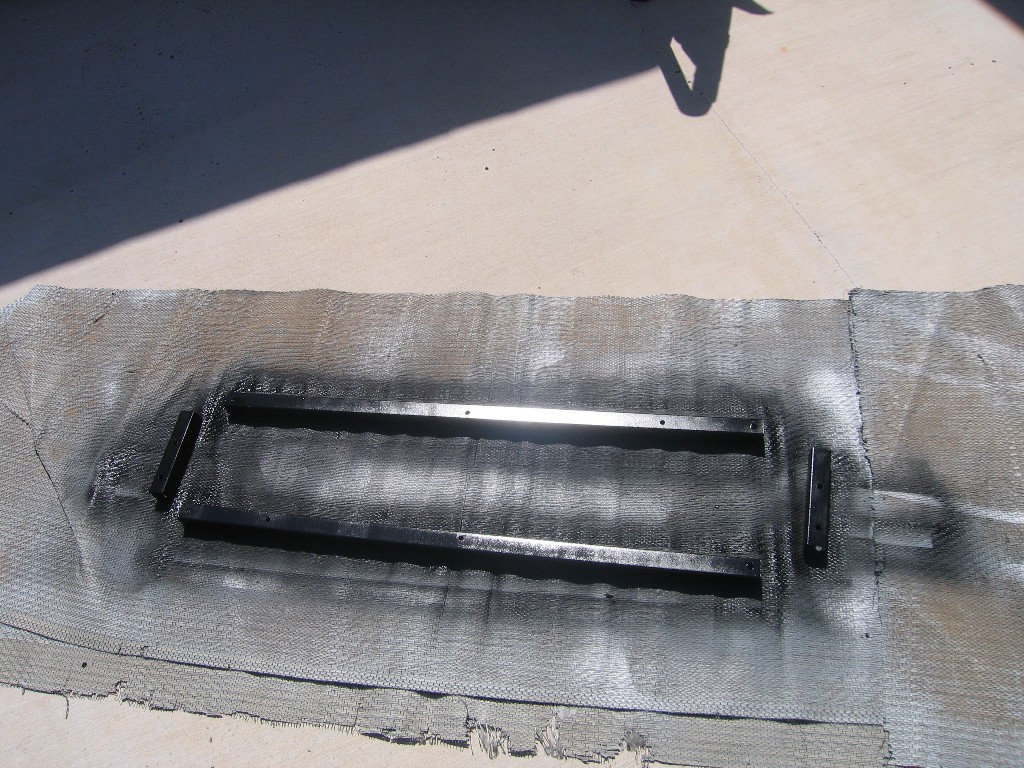 |
We used 1" square steel tube to make a frame for hanging the water filters. We are going to bolt the long pieces to the steps frame. The shorter pieces were used to space the long pieces from the steps frame and the steps material so we would have nut clearance space behind the long pieces to bolt the filters bracket to the runners.. | |
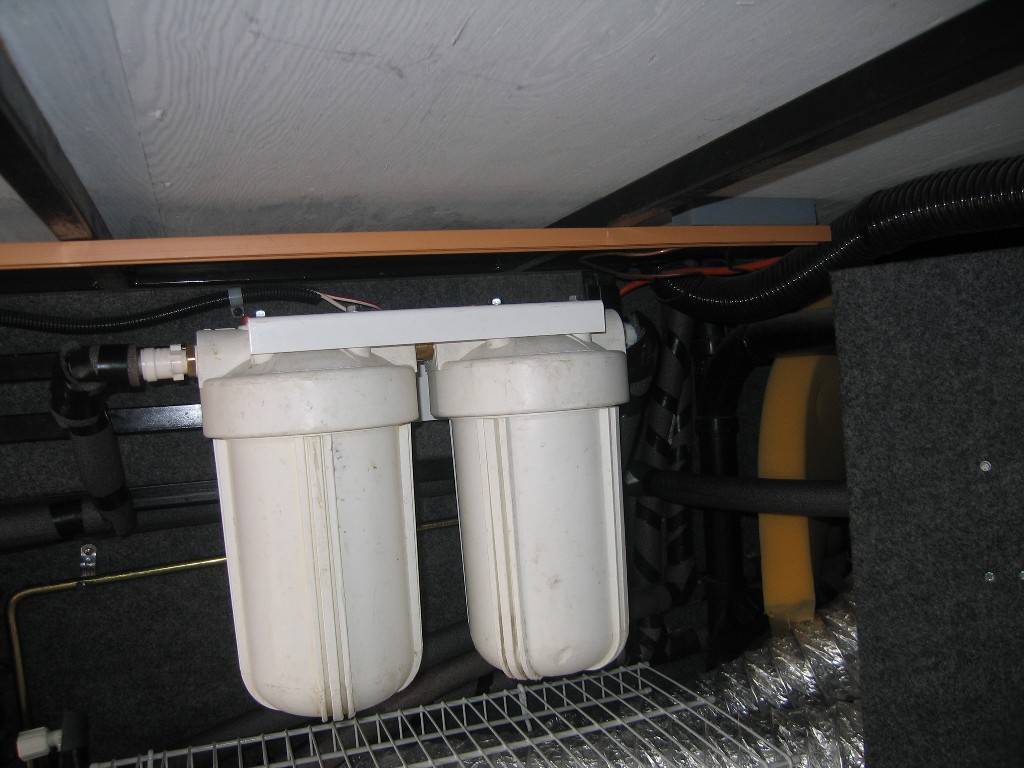 |
We bought the white bracket for the filter canisters from the RV Water Filter Store.
We originally bought the filters, canisters, gauges, and subsequent
replacement filters from them. The bracket is 1/8" thick steel and designed for the Canisters. Normally the bracket would be mounted with the wall tab up. To get the filters closer to the ceiling, we mounted the bracket upside down. The only issue is that we had to mount the bracket to the steel rails before we could install the canister tops to the bracket. We made sure to leave enough space for the cartridge top screws. |
|
click on pictures to enlarge |
||
 |
Another view of the mounted filters. | |
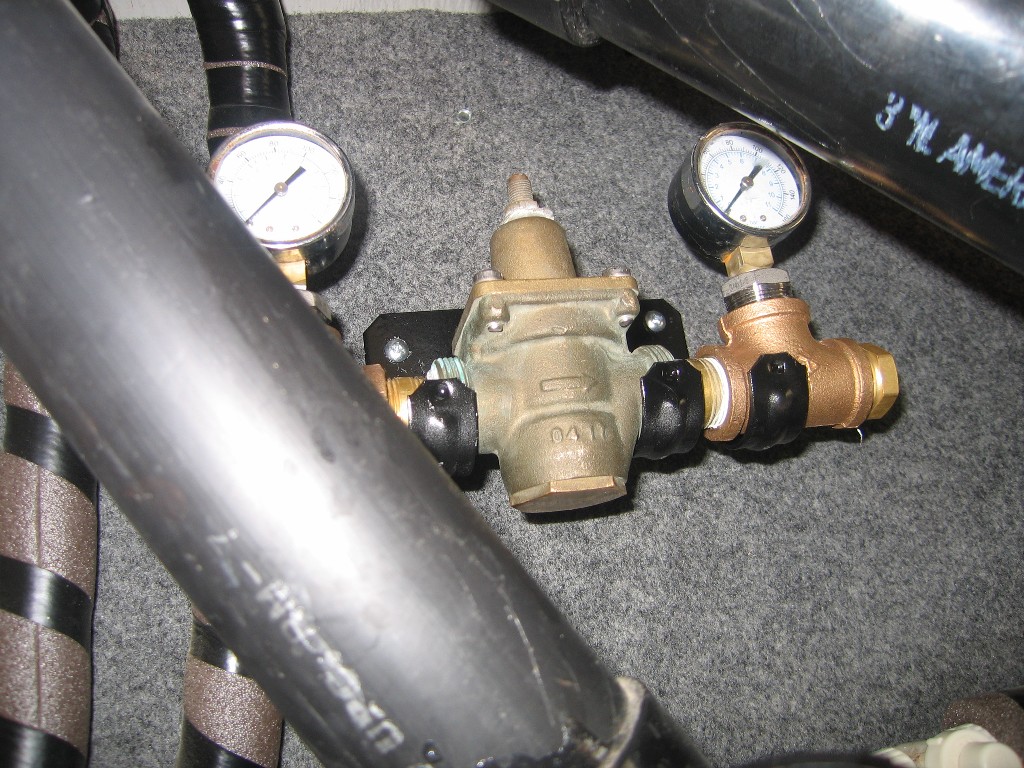 |
We also brought the household water pressure regulator onboard.
We eliminated the hose fittings that were originally us to make most
of the water tub system. We found a heavy building angle bracket and single screw electrical conduit clamps to make the mounting bracket for the water pressure regulator. |
|
click on pictures to enlarge |
||
 |
The trailer plumbing fed the cold water for the kitchen,
shower, and bathroom vanity from the city water feed on its way to
the water pump. That was
okay when we have the filter and pressure regulator externally between the
city water feed and the park water faucet. With the filters and pressure regulator onboard, we had to install a new city water inlet that went straight to the water pressure regulator. We picked a spot just about the second electrical power inlet. |
|
 |
Since we drilled a hole through the wall which exposed the foam and
fiberglass insulation. We sealed the insulation in the hole will duct tape. |
|
click on pictures to enlarge |
||
 |
This is the PEX water line from the new city water inlet heading
towards the water pressure regulator. We used a combination of :Shark Head" type slip in couplings from Sea Tech and crimped PEX fittings. We covered all the new lines with pipe insulation. |
|
 |
Here is the PEX pipes from the water pressure regulator to the filter canister input. We used the "Shark Head" fittings to allow some flexibility in getting the pipe in place as the PEX pipe can rotate in the couplings. Crimp fittings do not allow rotation. |
|
click on pictures to enlarge |
||
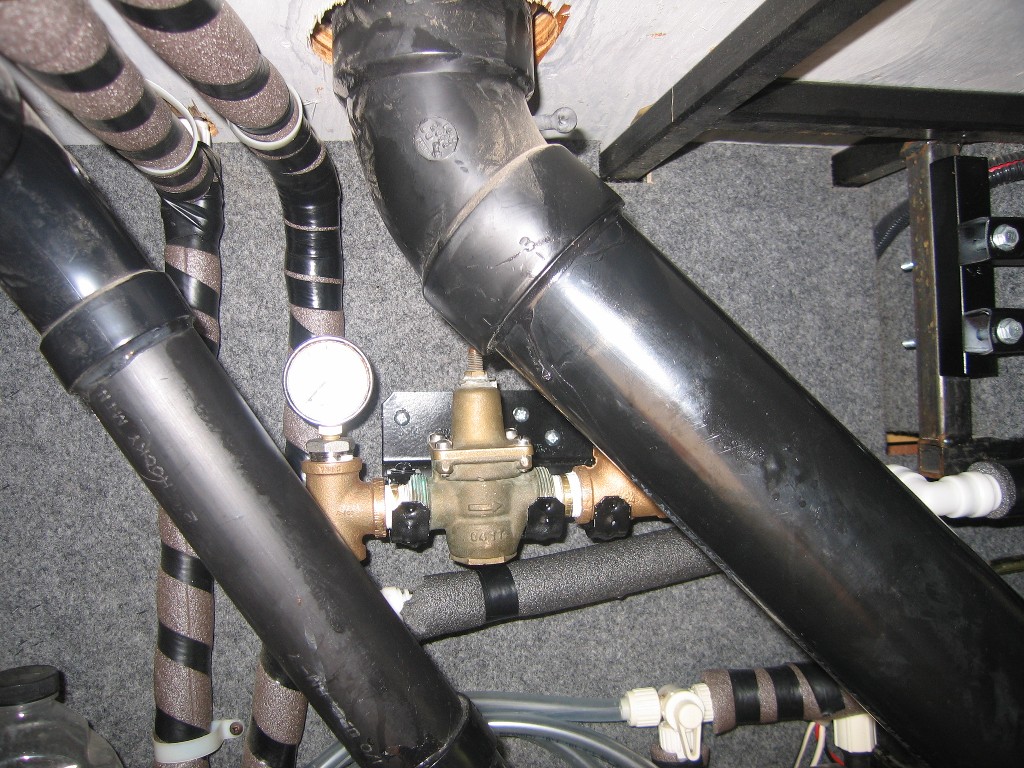 |
The water pressure regulator connected to the city water inlet and the filters. | |
click on pictures to enlarged |
||
 |
We added a diverter valve between the freshwater tank and the
existing diverter valve for injecting antifreeze solution. When the valve is turned, city water in pushed into the freshwater tank. We actually had to flip the valve with the handle behind to get the water flow the way we wanted. A little inconvenience but a great improvement over using the old freshwater tank feed. |
|
 |
Update-We obtained some more "shark head" elbows so we could flip the diverter valve over to have the handle more accessible. |
|
click on pictures to enlarged |
||
|
Update: Things seemed to be fine for quite a while until we noticed that the water pump was cycling more than usual. The pump was putting out a burp about every 7 minutes and that is more than what the ice maker caused. About the same time we noticed that the fresh water tank was filling on its own when we were using city water. At first was thought the water pump might be defective but that did not explain the filling of the fresh water tank. Then we suspected that the check valve function of the water pump was not working. It took some testing before we discovered that the Selector valve we had installed to put city water into the fresh water tank was not working was we expected. |
||
 |
We were feeding city water into Port B of the Selector Valve, the
fresh water tank on Port A, and the water pump on Port C. With
the valve handle in the position shown, the water pump would suck
water from the fresh water tank through Port A to Port C. When
the handle was turned, city water would flow from Port B to Port A. What we found was the Selector Valve was designed to control water flowing into Port A to either Port B or Port C. It was not designed to block water from Port B or C to Port A. |
|
click on pictures to enlarged |
||
|
When in the position shown, when on the water pump, some water would
seep from Port B to Part A and the water pressure would slowly drop
until the water pump turned on and rebuilt the water pressure.
When on city water, the seepage from Port B to Port A would
eventually fill the fresh water tank. Once we understood the problem, we thought about that valving some more and came to the conclusion that we only needed a shut-off valve between the city water line and the fresh water tank. We did not need to disconnect the water pump from the fresh water tank while filling the tank. |
||
 |
We replaced the Selector valve with a shut-off valve and a tee.
Now the fresh water tank is filled only when we open the valve and the water pump only runs when something is using water. |
|
click on pictures to enlarged |
||
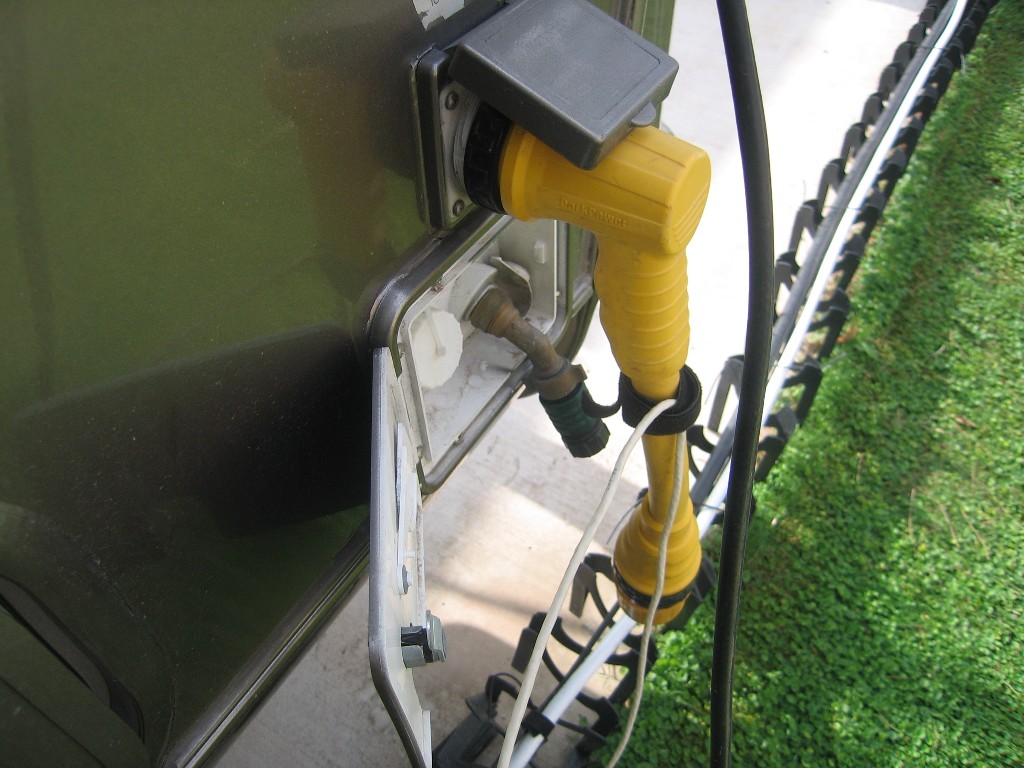 |
We like to use quick disconnects for our hose connections for ease and to use disposable
fittings to protect the hose ends and the trailer city water inlets. Previously, we used a 45 degree extension to get the city water inlet outside the door. We would put a capped quick disconnect to protect the extension when we were traveling. |
|
 |
The new city water inlet we installed is not behind a door.
With the hose directly connected, there is a great downward strain
on the inlet. The standard 45 degree and 90 degree extensions are too long for this location. |
|
click on pictures to enlarge |
||
 |
We bought a
Kwik Link Connector set. The 90 degree box fits close to
the body. The Kwik Link connector is made from stainless steel
as many of the items from RVH2O. We bought some of our high
pressure hoses form RVH2O too. The type of quick disconnect end used in the Kwik Link is different from plastic fittings we currently use. We will use one short hose with the Kwik Link connector on the trailer end and our regulator quick disconnects on the other. |
|
click on pictures to enlarge |
||
Disclaimer: The information in this site is a collection of data we derived from the vendors and from our personal experiences. This information is meant as a learning guide for you to make your own decisions Best practices and code should always be followed. The recommendations we make are from our personal experiences and we do not receive any compensation for those recommendations. |