
Please wait, I'm coming over...


Last Changed 11/5/2016 |
||
One of the problems in RVs is having enough power receptacles for all the modern devices needed. In our Bounder, the compartment behind the bedroom TV housed the Dish Hopper 3 Satellite DVR, two Dish Joeys client modules, the control module for the Winegard Trav'ler automatic roof satellite dish, a HDMI splitter, a wireless router, a Sleek air-card modem amplifier, a fan unit for the Hopper, a fan for the Sleek, and a couple of USB power mods. And there is a needs for a receptacle for the TV. All these devices do not need much current but they use lots of receptacles, |
||
 |
Four of the devices use these power brick plugs which use three receptacle slots on a regular power strip. The four power brick plugs, side-by-side, would use 7 regular power strip slots. | |
 |
Before cleaning up, we used two power strips to
accommodate all the
receptacles we needed. Note how the yellow power plug forces the cord straight out. |
|
click on images to enlarge |
||
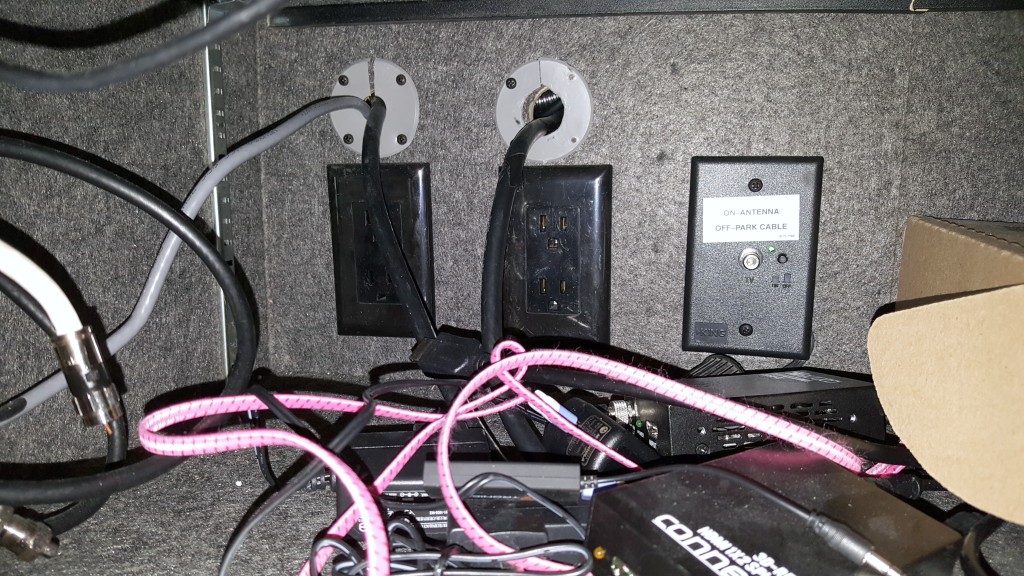 |
The Bounder did come with three duplex receptacles in the
compartment behind the bedroom TV. One above the shelf and two below. Not even close to being enough. |
|
 |
We bought a
Tripp Lite TLP1208TEL twelve receptacle surge protection power strip.
The main feature we wanted was the four wider spread receptacles to plug the power brick plugs into. |
|
 |
The normal provision for mounting power strips is to place screws in the wall to engage slot (usually four) on the underside. We found this mounting method to be not very good. The hardest thing is location the four screws in the proper location and then getting the four slots over the screws. | |
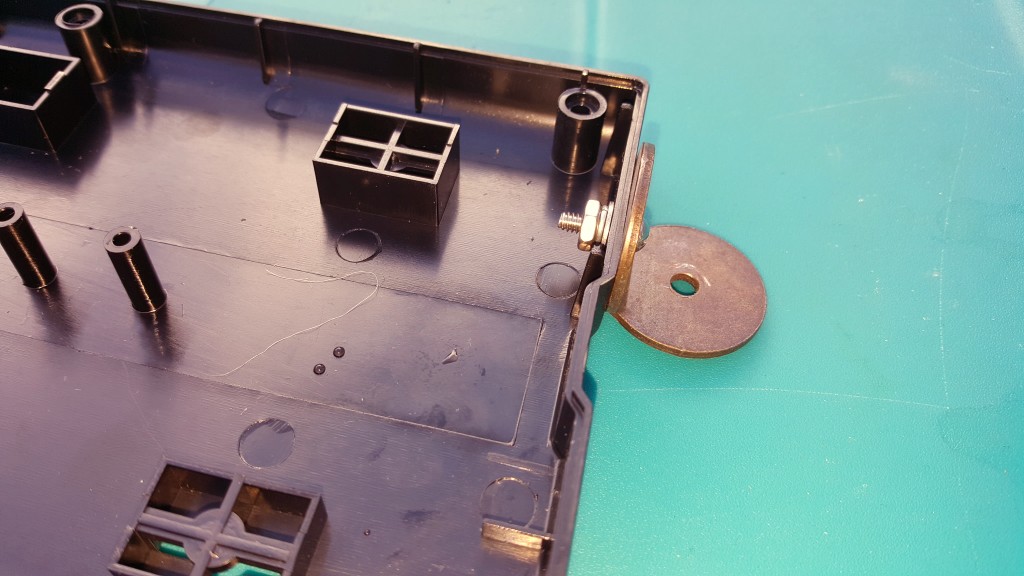 |
We disassembled the power strip and mounted these angles brackets we had using nuts and screws. | |
click on images to enlarge |
||
 |
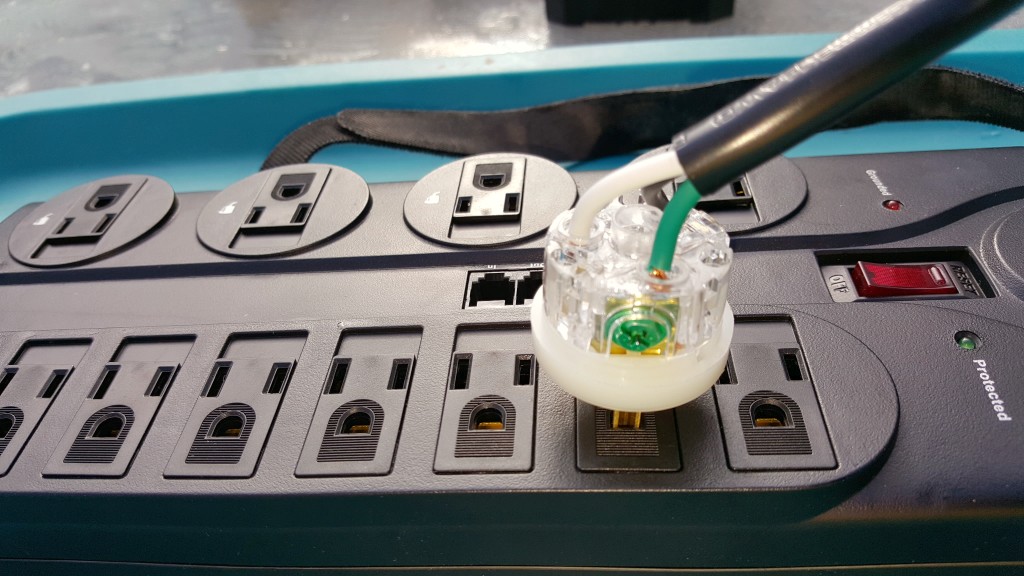
We were concerned about the power brick plugs being vertical and actually a slight angle to the power strip surface staying seated. We mounted two Velcro strips to rap around the power bricks. We used wire ties through the normal mounting holes We were concerned about the power brick plugs being vertical and actually a slight downward angle to the power strip surface staying seated. We mounted two Velcro strips to wrap around the power bricks. | |
 |
We used wire ties through the normal mounting holes to secure the Velcro strips. | |
 |
The power strip is mostly done. The last modification is to shorten the cord on the power strip. The surge protection strips tend to come with longer cords and they add to the "rats nest" of the compartment. | |
 |
We could have cut a section out of the power strip cord and spliced
it. But the spiced area tends to be a lot less flexible
especially when the cord is shortened a lot. That is why we
used a replacement plug We found these Leviton 5266-CA replacement cord ends. |
|
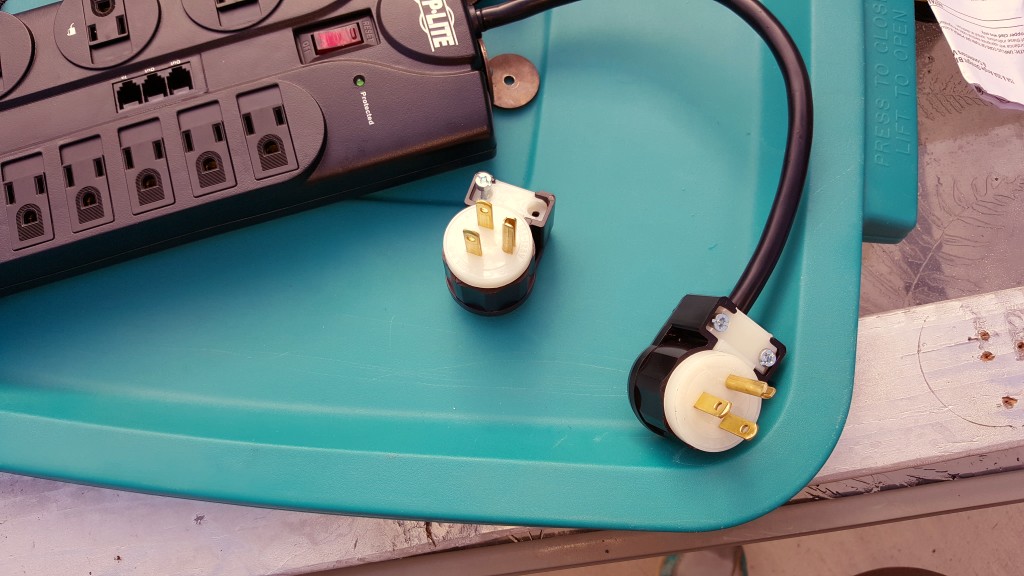 |
The Leviton 5266-CA are right angle plugs plus the prongs can be
orientated in eight directions. This is so much better than the normal replacement plugs that force the cord to come straight out of the receptacle. |
|
click on images to enlarge |
||
 |
The modified power strip is mounted on the back wall of the
compartment. This will make the power cabling so much cleaner. Note how the power cord lies against the wall. We are also going to mount a USB power hub to handle all the USB power requirements. |
|
 |
Still a lot of stuff in the compartment but it is better organized. | |
Disclaimer: The information in this site is a collection of data we derived from the vendors and from our personal experiences. This information is meant as a learning guide for you to make your own decisions Best practices and code should always be followed. The recommendations we make are from our personal experiences and we do not receive any compensation for those recommendations. |