
Please wait, I'm coming over...


Last Changed 4/13/2014 |
|||
| We were hit by a hail storm when we were in South Dakota. We had a lot of damage to our car but just a little to our trailer. One thing damaged was the skylight over out shower was cracked. The skylight needed to be replaced but we also took the opportunity to fix some things that we did wrong when we applied Eternabond to the original skylight, our first Eternabond project. | |||
 |
One of the things we did wrong was to not get the Eternabond tight
to the edge of the skylight dome. That left an air gap which
allowed the microseal mastic to dry out under the protective tape. The impact of the hailstones broke the tape over the air gap. |
||
 |
The other thing we did wrong was to allow an air gap around the
screw head that help the skylight dome down. Like the air gap and the sides of the dome, the "tented" tape was broken by the hailstones. |
||
click on pictures to enlarge |
|||
 |
The
old dome were remove and all the old caulk and putty was removed.
The area was cleaned with lacquer thinner for a very clean surface., |
||
 |
The replacement
skylight dome was really two domes, The outer
tinted dome was 5" high in the center while the clear inner done was
3.5" high. The original dome was about 3.5" high total with
the inner dome being quite thin compared to the outer dome. Our
new domes are full thickness acrylic domes, much stronger. We use double sided Eternabond tape to bond the two domes together after holes were pre-drilled. Bolts were used to bind the two domes together. |
||
click on pictures to enlarge |
|||
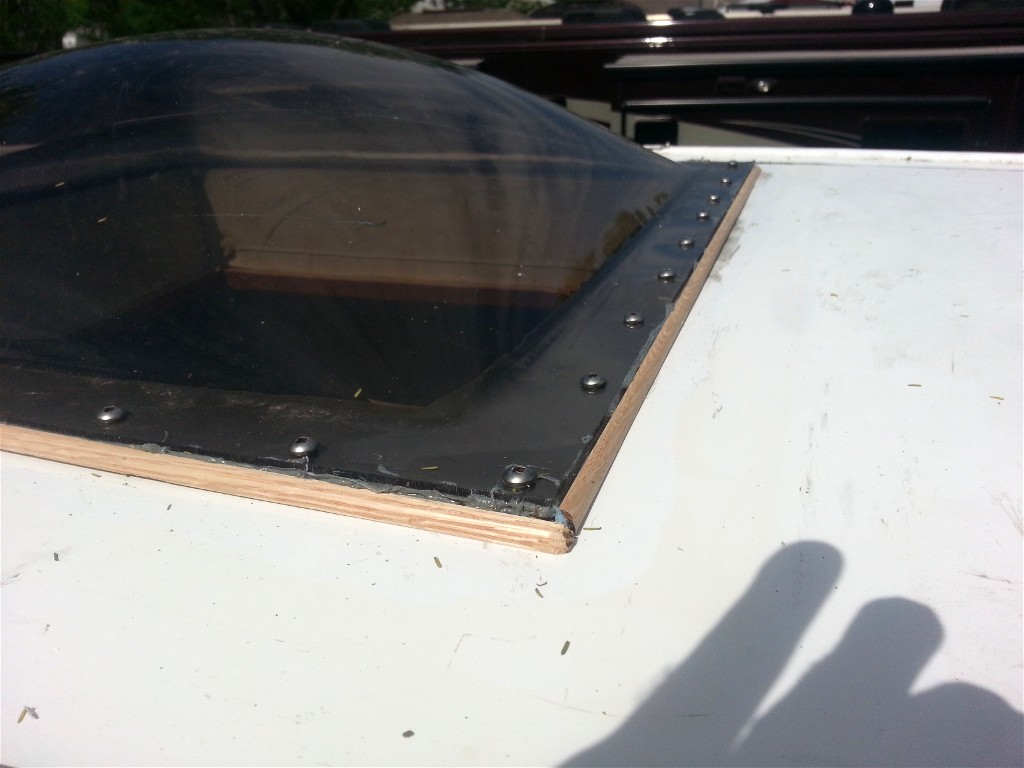 |
Double-sided Eternabond was used between the roof and the domes.
1/4" quarter-round trim was used to create a filet edge to the domes. The idea is to have a smoother shape for the top Eternabond tape to follow. This was to eliminate the air gap that we had on our first job. |
||
 |
Ready for the regular Eternabond tape to be applied over the screws and the
domes flange. To insure not air gaps around the screws, a 7/16" socket was used to firmly press the Eternabond tape around the base of each screw. Then the rest of the tape was firmly rolled down with a heavy roller. |
||
click on pictures to enlarge |
|||
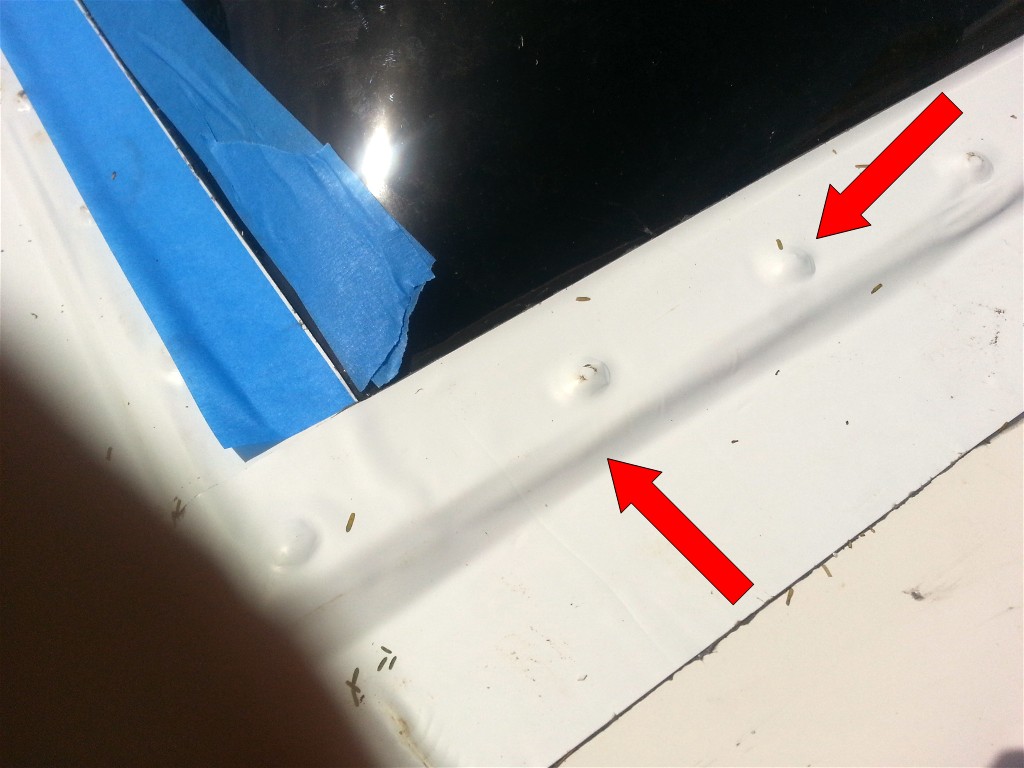 |
Using the socket assured a good airless contact of the Eternabond
tape with the screw heads. The quarter-round filet's provided a smooth rounded edge instead of the shape square edge we had on the previous dome. |
||
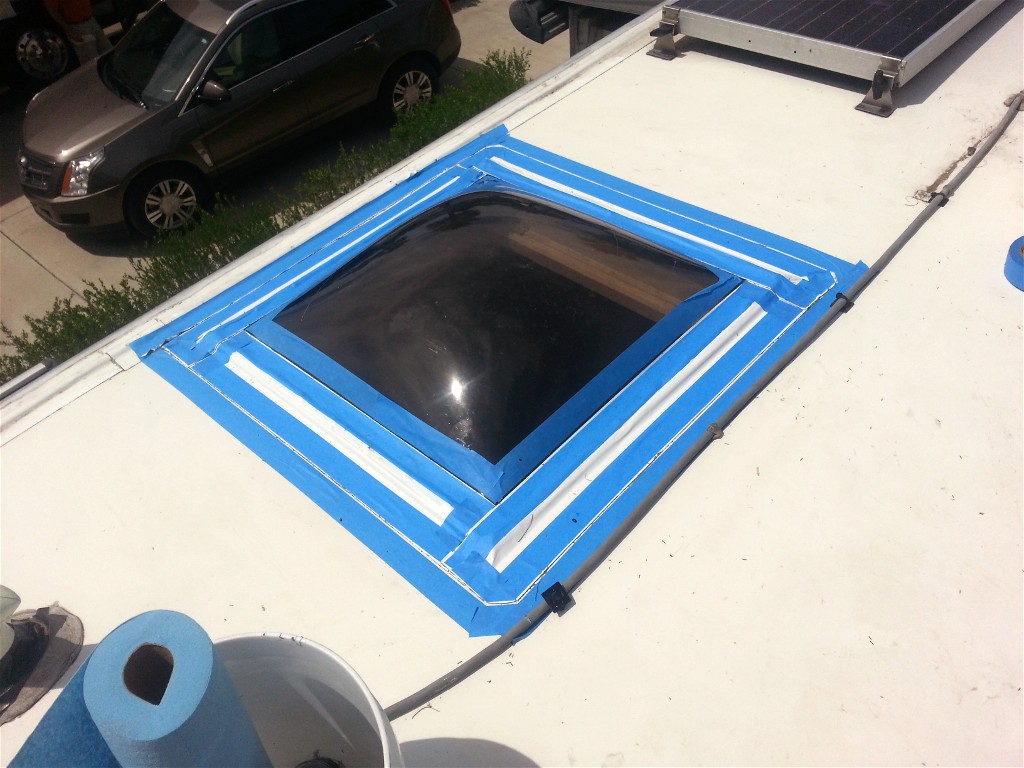 |
We caulk all exposed edges of the Eternabond to prevent wind working under the tape. The Eternabond company recommends this for the leading edge of tape facing the road. We do all edges. | ||
click on pictures to enlarge |
|||
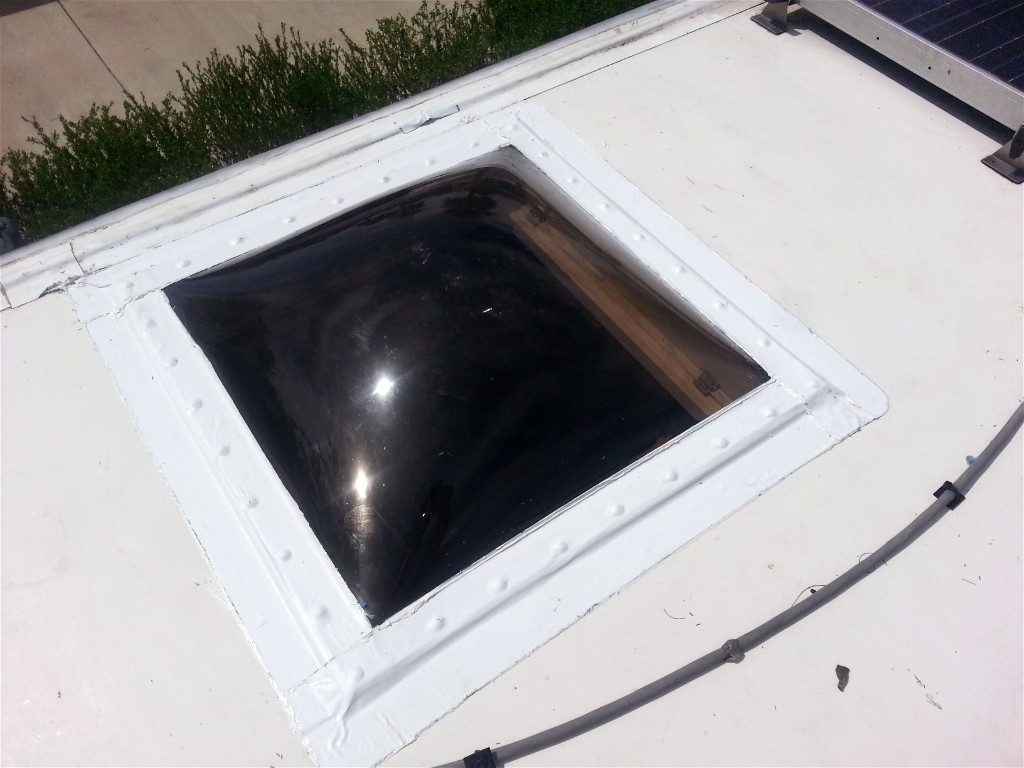 |
The completed dome replacement. | ||
click on pictures to enlarge |
|||
Disclaimer: The information in this site is a collection of data we derived from the vendors and from our personal experiences. This information is meant as a learning guide for you to make your own decisions Best practices and code should always be followed. The recommendations we make are from our personal experiences and we do not receive any compensation for those recommendations. |