
Please wait, I'm coming over...


Last Changed 9/5/2017 |
||
|
All you have to do to setup up your satellite TV dish is to aim it at a satellite located 22,400 miles above the Earth,
something you Can not possibly see. So how do you do it? For Dish, there are two sets of satellites that carry Dish signals. Satellites 119, 110, and 129 are the Western Arc (WA). Satellites 72.7, 61.5, and 77 are the Eastern Arc (EA). While the WA satellites can cover most of the continental United States, the EA satellites help with getting better satellite views in the East. Also, Dish has placed the HD Locals (Broadcast channels, ABC, CBS, FOX, and NBC) for most eastern cities on the EA satellites. Wanting eastern Locals is a reason to use the EA. For this discussion, we are using the WA. |
||
|
Satellites are referred to by their position in the orbit over the Equator. For Dish, we want satellites 110, 119 and 129 which are at 110°, 119°, and 129°. These satellites are the Western Arc (WA) for Dish. We use satellite 119 as the aiming satellite as this is the primary Dish satellite. All the basic programming is on 119. Satellite 110 carries expanded programming and satellite 129 carries most of the HDTV programming. Dish supplies the initial settings for the dish setup from tables based upon the Zip Code your are at. These tables are either in the satellite receiver for dual LNBFs (Low Noise Blocking Filter). For triple LNBF dishes like we have, we use a table in a manual. The three values you look up are the Azimuth, Elevation and Skew. We will cover these below. All the values are based upon aiming at satellite 119. This spreadsheet, Dish Settings, provides an easy lookup for the Azimuth, Elevation, and Skew for a DPP 1000.2 dish, by entering the zipcode. This sheet has been capturing some of the deviations (described below) at some of the locations we have set up. Set the TripodThe first step is the setup of the tripod. See Tripod Options for more information on tripods. The goal is to have the vertical mast of the tripod to be perfectly vertical. You also want the tripod to be secure against wind forces.The mast being vertical with the skew adjustment, insures that when there are multiple LNBFs, they are aligned to the arc where the satellites are found. A non-vertical mast will mean that only one of the multiple LNBFs will be on the satellite arc. We already had an Align-a-Site for setting up our Satellite Internet Dish. We purchased an additional base plate and attached it to our DPP 1000.2. We put the desired Azimuth and Elevation settings into the Align-a-Site and then put it on the DPP 1000.2. |
||
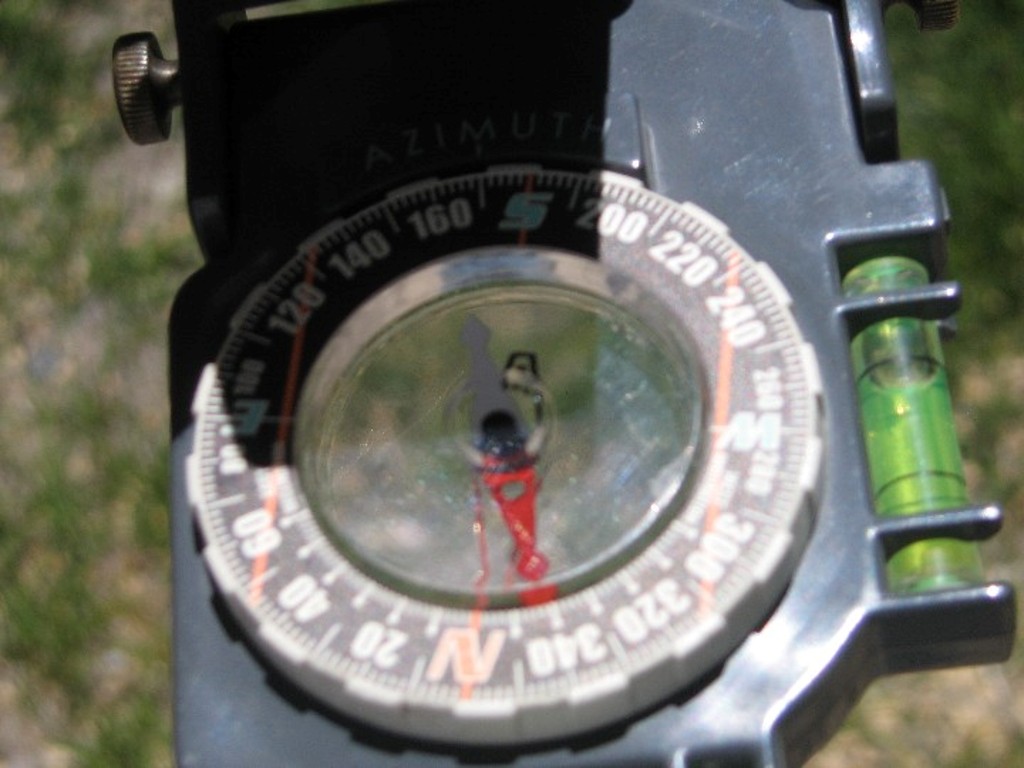 |
The first step is to find a spot with a clear view of the sky. After we lookup the setup values, we set the Azimuth vale on the compass of our Align-A-Site We set the Elevation value on the Align-A-Sight and then we set the Skew on the Align-A-Site to 0. Then holding the Align-A-Sight so the two levels are centered and then we swing around so the compass needle aligns and look through the periscope looking for trees and other obstructions. We move around until we find a spot that has a clear view. We usually swing to each side to make sure we have some room to align the dish. | |
 |
When we didn't have the Align-A-Sight, we used a compass on top of the tripod mast to aim the front leg of the tripod in the Azimuth direction. | |
click on images to enlarge |
||
|
In the setup of our tripod, we also set the initial Azimuth
setting. This is the magnetic compass reading of where we are going
to point the dish. We have a compass that pops onto the top of the
mast. The advantage of setting the Azimuth now is that the metal of
the dish is not present to upset the compass reading. We use the
front leg of the tripod and the indicator of the Azimuth we had set
the tripod to. When we use the Align-a-Sight Compass, it is near the metal dish. We have learned that the effects by metal on magnetic flux can add to the Compass readings. This is called Deviation. So far we have seen the Deviation be from 0 to 19 degrees. When we scan for the satellite, we move in the positive direction to account for the Deviation. |
||
 |
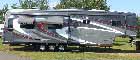
Here is why we wanted a tripod with adjustable legs. The only
location on the camp site that would give us a satellite shot was on
this slope. A traditional roof tripod would have never worked here.
This was our old tripod. |
|
click on images to enlarge |
||
Note - we eventually found that the tripod that had worked so well with the DishPro 500 was not quite up to the loading of the DPP 1000.2. This happened during a serious wind where the water ballast buckets could overcome the arm weight. We acquired a new heavier duty tripod, again from H&G. We have pictures of the new tripod at H&G Heavy Duty Tripod . |
||
 |
We use PVC blocks with chains to restrain the tripod legs. The
blocks also act as pads so the tripod won't settle on wet ground. We use about 3 gallons in each of the 5 gallon buckets for ballast We use covers on the buckets to cut down on water evaporation doe to wind. |
|
click on images to enlarge |
||
|
We attach the buckets with bungee cords. If we expect a lot of wind, we fill the buckets with 5 gallons of water. If you don't want to use water ballast to secure your tripod, you can use Claws or other ground anchors. You want your tripod secure. |
||
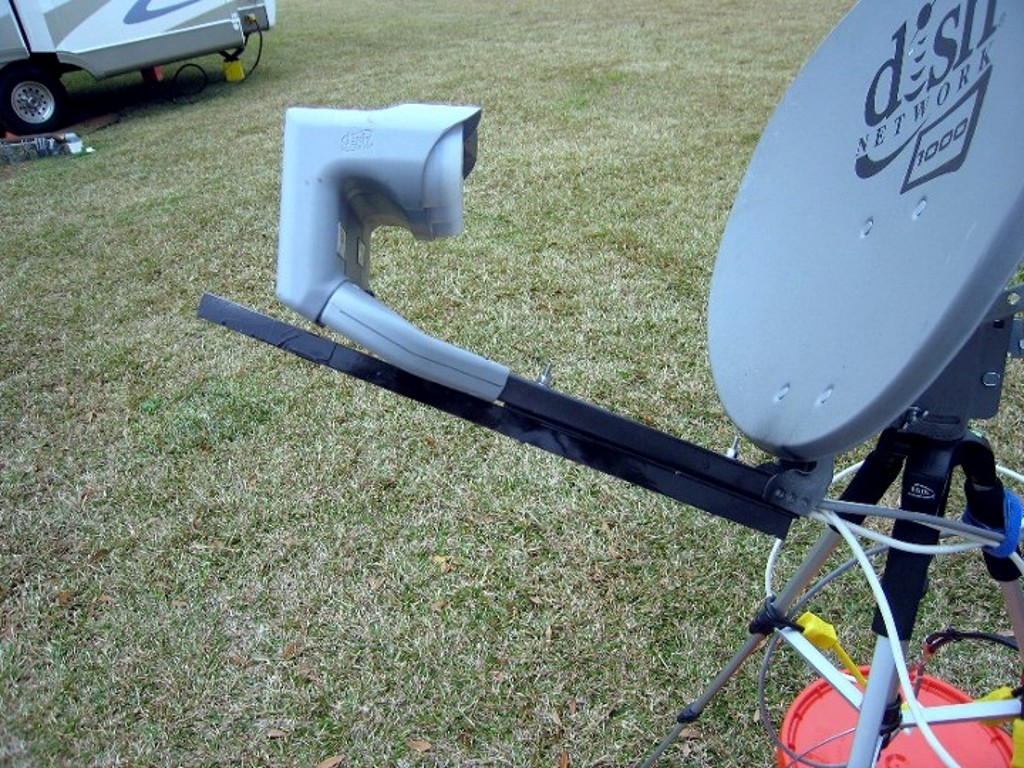 |
Because we had the plastic LNBF break when the
old tripod tipped over, we also made a modification to the dish itself to protect the LNBF bracket. We used some aluminum square tube and flat stock bolted to the dish arm. In the event of a tip over, the arm extension with absorb the impact. With the new HD Tripod, we no longer had to have this mod. |
|
click on images to enlarge |
||
Level Mast |
||
 |
With the load on the tripod, we then adjust the tripod legs to get
the mast vertical. Here we are using a bubble level. |
|
 |
A small regular level could be used by checking the mast on the front and side. | |
click on images to enlarge |
||
Dish Skew |
||
 |
First we should understand what Skew is for. In this photo, the
arc the satellites are located on is superimposed on the sky.
This photo was of a smartphone running an app from
DishPointer.com. The three LNBFs
of the dish are fixed to
the dish so the dish needs to be twisted on its axis for the LNBFs to
align to the satellites. This twist is the Skew. The reason for the mast to be vertical is that it the mast is not vertical, as the dish is moved from side-to-side, the dish Skew will change and the LNBFs will not align to the satellites. |
|
click on images to enlarge |
||
 |
The next step is to preset the Skew of the Dish. We set the Skew value on the Dish scale before we mount the dish. It is easier to do before it is on the mast. We have never had to change the Skew once we set it on the scale. |
 |
 |
With the dish mounted on the tripod, we then run the cables from the trailer to the tripod. | |
click on images to enlarge |
||
Elevation |
||
 |
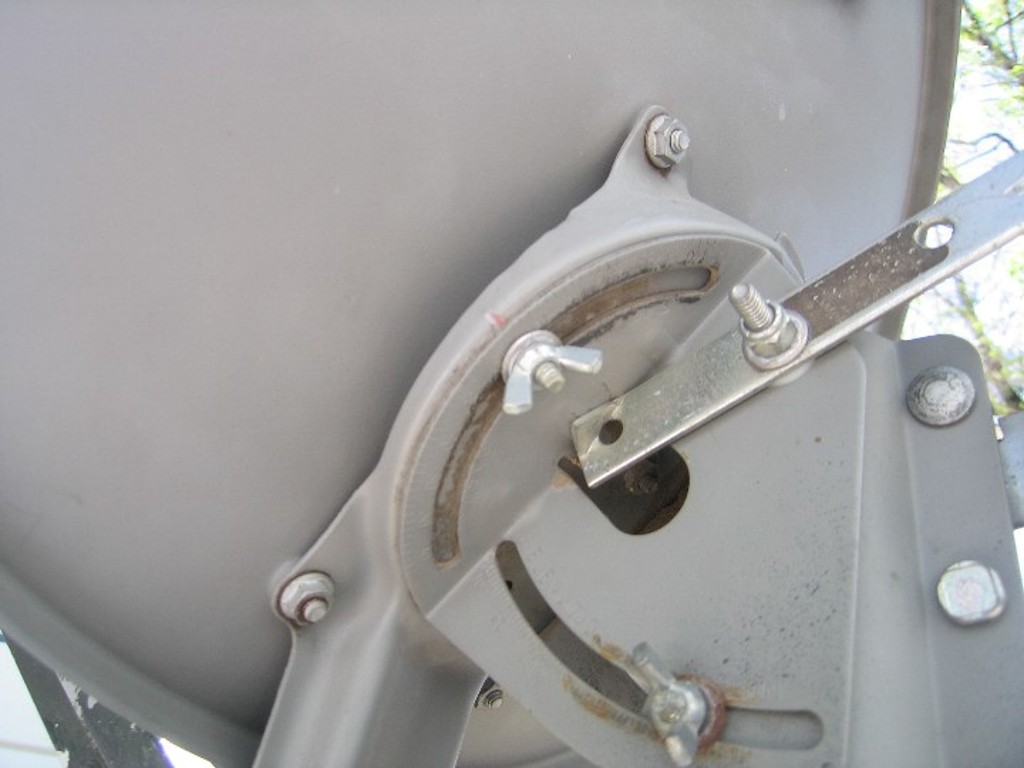
The next step is to preset the Elevation. This is the angle of the Dish to the vertical mast. This is part of aiming at the target
satellite. We had added the Satellite Dish Conversion Kit from TV4RV.com to make Elevations adjustments easier with a screw adjustment. |
 |
 |
Since we use the Align-A-Sight, we set the Elevation on it's scale. | |
click on images to enlarge |
||
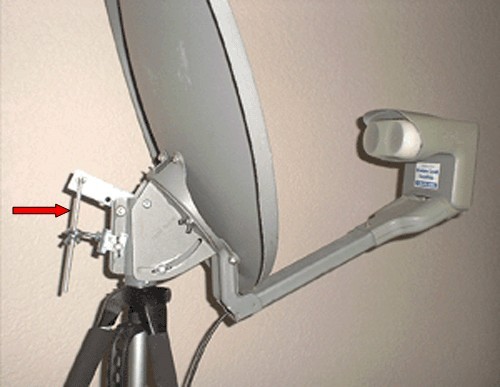
 |
Now we mount the Align-a-Sight into the bracket on the dish. Since we set the Skew on the dish, we just adjust the Align-a-Sight Skew level so it is centered. Having it centered is important as being off can cause the compass needle to hang up and also cause the Elevation bubble to mis-read. | |
click on images to enlarge |
||
AzimuthWhile we could set the tripod to the direction we wanted, it was hard to aim the DPP 1000.2 to that same direction by eyeball. The dish arm is not a reference because the dish is twisted to the side.When we setup the tripod, we usually aim one leg in the azimuth direction to give us a reference point when we start to aim the dish. |
||
 |
Setting the Azimuth can be very frustrating as the arm of the dish
does not point anywhere you think the signal focus is. The
signal bounces to the LNBF with a 15 degree offset. Then the
dish is twisted on the horizontal axis by the Skew adjustment which
can be up to 140 degrees. The result can be where the dish appears to be aimed into the trailer as in this photo. |
|
 |
Step back and you can visualize the 15 degree vertical offset and the 138 Skew at this location points to the right of the trailer. | |
click on images to enlarge |
||
We found that after a couple of setups, the metal in the dish was causing compass deviation errors up to 19°. We line up the azimuth arrow in the Align-a-Site and we are almost dead on now. Even with the consideration of the Deviation correction, we still could wind up on the wrong satellite once in a while. After determining what direction we were off, we add or subtract to the Align-A-Site compass and tweak. It is a lot easier to see 9-10° on a compass than looking into space. |
||
Now to find that satellite out there 22,400 miles up. If our tripod mast was vertical, the Azimuth, the Elevation and the Skew were all set properly, we should be in the ball park. The reason for only being in the ball park is that a Zip Code can cover a large area of real estate. Therefore a little tweaking will be necessary. The goal is to aim the 119 LNBF towards satellite 119. Assuming the Skew is set properly, then the 110 and 129 LNBFs should be pointing towards their related satellites. The Dish has a built in Switch. The Switch accepts signals from the three LNBFs and connects them to the outputs as needed. This is great for hooking up receivers to the LNBFs but is can be a real problem when aiming the dish. The reason is that you could be led astray by either the 110 or 129 LNBF being aimed at satellite 119. You would have an indication of being on 119 but the other satellites are not being pointed to. To alleviate this problem we tried disconnecting the 129 LNBF from the Switch and putting aluminum foil over the 110 LNBF. This would allow only the 119 LNBF to receive signals and when we get a lock on, we would know that the 119 LNBF is pointing at the satellite. However, with the Switch, there was no surety that the cable we had the meter connected to was electronically connected to the 119 LNBF. |
||
Aiming Scope |
||
 |
We use an Align-A-Site because we had one from our Satellite Internet package.
If we were buying today, we would buy the
Satellite Dish Aiming Scope from
TV4RV.com because does what we really use from the
Align-A-Site at 1/4 of the cost. Also the Align-A-Site is virtually impossible to find as it appears it is out of business. |
 |
|
The scope is better than the smartphone apps that some people
recommend because there is no physical reference between the
smartphone and the dish. Because of the angle of signal
bounce off of the dish reflector, you think you know where the
dish is pointing but it isn't. Looking through the scope, you can
see the branch that is in the way. The only advantage of the Align-A-Site at four times the cost is that you can walk around with it to get a rough idea of a clear space. A smartphone app would do this too. Alignment MeterTo solve the 119 LNBF selection problem, we bought a meter that can select the 119 LNBF by putting a 22KHz signal on the wire. The 22KHz signal tells the Switch to connect the 119 satellites signals to that output. Without a meter that can select the satellites, use the Switch Check screen in the receiver (usually Menu-6-1-1) and set the Tuner/s to 119.Acutrac 22 ProUpdate - the Acutrac 22 Pro is not available new but there are listings on eBay for the meter. |
||
 |
We have Acutrac 22 Pro meter that we put in line with the cable from the Switch to the receiver. This gives us a visual indication of the signal strength. The Acutrac 22 Pro actually has two inputs so that is could be looking at the 119 LNBF and the 110 LNBF at the same time. We have just been using the primary input. | |
We have found that we only need to connect one wire to the dish since we can select the 119 LNBF by turning on the 22KHz signal. The Acutrac 22 Pro solved another problem. The Dish receiver needs to runs a Switch Check when the environment changes. We also has a roof mounted dish that is a different "switch" than our DPP 1000.2. To complete the Switch Test, the satellite receiver has to pick up a valid satellite. If the Switch Test is not completed, you cannot use the receiver to try and select the 119 LNBF. This is like a Catch-22, you need the Switch Test to find the satellite, you need the satellite to run the Switch Test. By using the Acutrac 22 Pro meter, we can use it to select the 119 LNBF and get the dish aligned on the satellites before running the Switch Test and having a completed test. |
||
 |
Using the Acutrac 22 Pro meter reading, we tweak the azimuth and elevation setting for a maximum reading. If you note the photo of DishPointer above, the odds of swinging the dish side-to-side and expecting to see all three satellites is virtually impossible. If you could, then you would find all three and focus on the center one. But you might see two of the three satellites at a given elevation, but which two? |
|
First Strike FS1Over time the battery in the Acutrac wore out but since it can work off of the voltage in the coax cable attached to the receiver. That worked until we changed the cabling to use Dish Separators so we could have two DVRs. The Separators blocked the voltage in the coax cables and I had to rely on the short window of time that the battery would power the Acutrac. One of the button switches was also worn out making it hard to select options.We could have replaced the battery in the Acutrac but that would not have solved the flaky button. While the Acutrac 22 Pro did a fine job for almost 6 years, we decided to replace it with an upgrade to a First Strike FS1 meter. |
||
 |
The main reason for getting a FS1 instead of another Acutrac was
that the FS1 identifies the satellite before it locks on so you only lock
onto the correct satellite. There are some other features that
helped justify the almost double the price. We found that since we now have the automatic roof dish, the occasional setup of the ground tripod more of a challenge and we felt better tools were in order. |
|
Super Buddy 29The Hopper 3 Hybrid LNBFs did not work with the FS1. We acquired a Super Buddy 29 because it was certified to work with the Hybrid LNBFs.A new version of the Super Buddy 29, the Applied Instruments XR-3, is quite expensive for amateur use. But used Super Buddy 29s are available on eBay. They may require a new battery. One of the advantages of the Super Buddy 29 is that the setup values for the dish are contained in the unit. You enter a zipcode, or a Canadian Postal code (a real boon when in Canada), and unit displays the setup values. |
||
 |
The Super Buddy 29 was pricey but it does the job. It works with Dish Hybrid LNBFs and it provides a Lock indication when it is on the desired satellite. |
 |
Switch Check |
||
 |
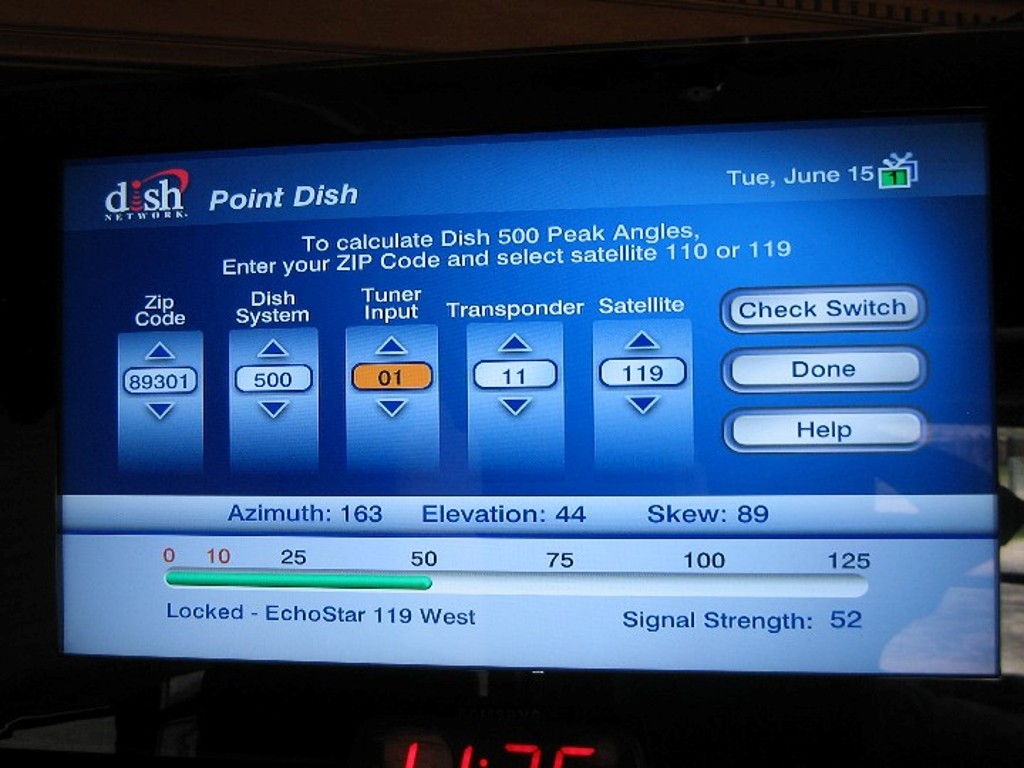
Once we feel we have peaked the Azimuth and Elevation, then we go
look at the TV to see what satellite the receive says it has locked
onto. It will only lock onto a Dish satellite, but it does have
three satellites to do that with. At this point we do a step that is not always required but we have found verifying this step prevents a lot of wasted steps. We go into the trailer and we do a Switch Test, a function of the Dish Receiver that validates the two inputs to the Receiver and the three LNBFs. We get an Okay, we proceed. |
|
 |
Sometimes, we find that we have locked onto satellite 129. If that
is the case, then we go back and swing the dish 10° to the left and
start over. Or we may have locked onto satellite 110 and we swing
the dish 9° to the right and start over. Referring to the photo above from DishPointer, if you are correcting from the wrong satellite, you will also have to tweak the Elevation a bit. If moving left from satellite 129, you need to raise the dish a bit. If moving right from satellite 110, you need to lower the dish a bit. We leave the Receiver in the Point Dish mode which puts out a tone in proportion to the signal strength. |
|
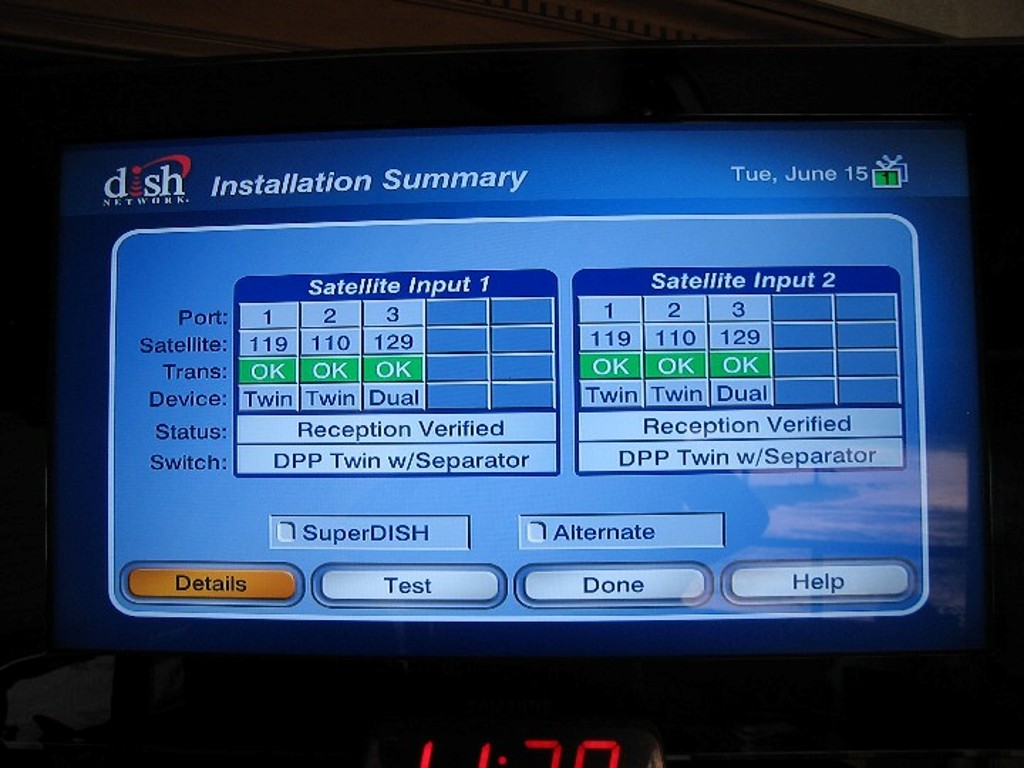
 |
This table shows the three basic conditions on where you have found
and homed in on a signal and then run the Switch Check. The top is what you hope for. The middle is when you have aimed in on satellite 110 and you need to swing the dish 9 degrees to the right and re-peak. The bottom is when you have aimed in on satellite 129 and you need to swing the dish 10 degrees to the left and re-peak. |
|
click on images to enlarge |
||
We set the Acutrac 22 Pro to put out a tone that increases as the signal strength grows from the satellite. It is easier to hear the tone in bright sunlight. To date, we have not bothered to tweak the Skew. When we have locked onto 119 using the system above, we have found the other satellites to be okay. |
||
Disclaimer: The information in this site is a collection of data we derived from the vendors and from our personal experiences. This information is meant as a learning guide for you to make your own decisions Best practices and code should always be followed. The recommendations we make are from our personal experiences and we do not receive any compensation for those recommendations. |